Michael M.
How to Perform a Factory Reset (FD8905)
A factory reset will return your camera back to its original system state by erasing all of the information stored on the device in an attempt to restore the device's software to its original manufacturer settings.
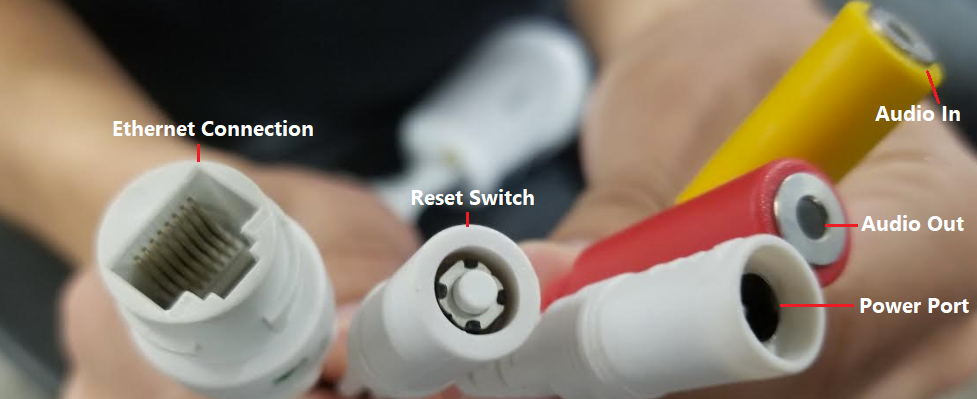
Note: The reset switch for your camera will be on the dongle wire of the camera. The dongle wire on the camera has the following connections:
- Ethernet Connection
- Audio In
- Audio Out
- Reset Switch
- Power Port
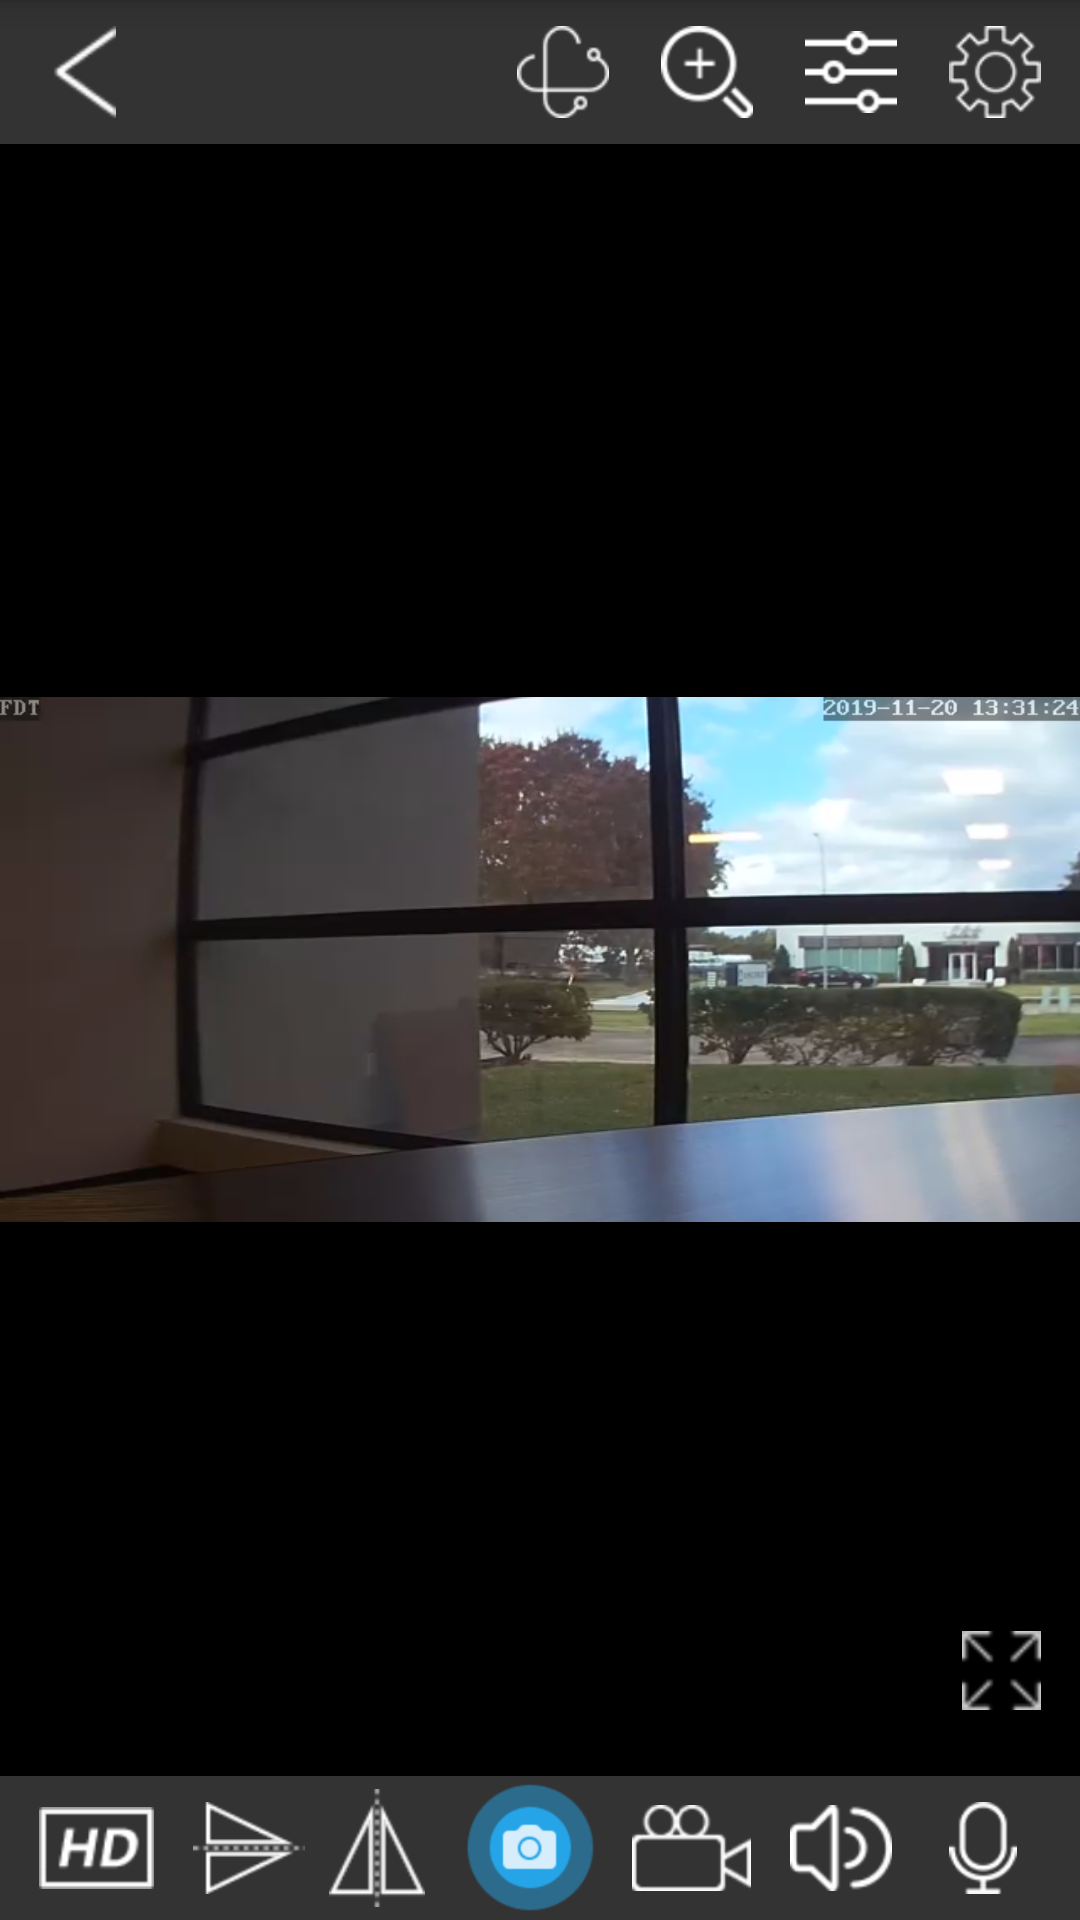
Step 1: Use an Ethernet cable to create a direct connection with your network then apply power to your device. Allow the camera to load. Locate the Reset Switch on the dongle wire of the camera.
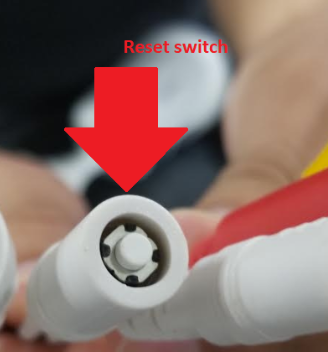
Step 2: Press and hold the reset switch for 15 - 20 seconds and release, allowing the camera to reset.
Give the camera roughly 30 seconds to reboot. The username and password and all your settings will revert back to its original factory default settings. The default username and password for your camera is admin.
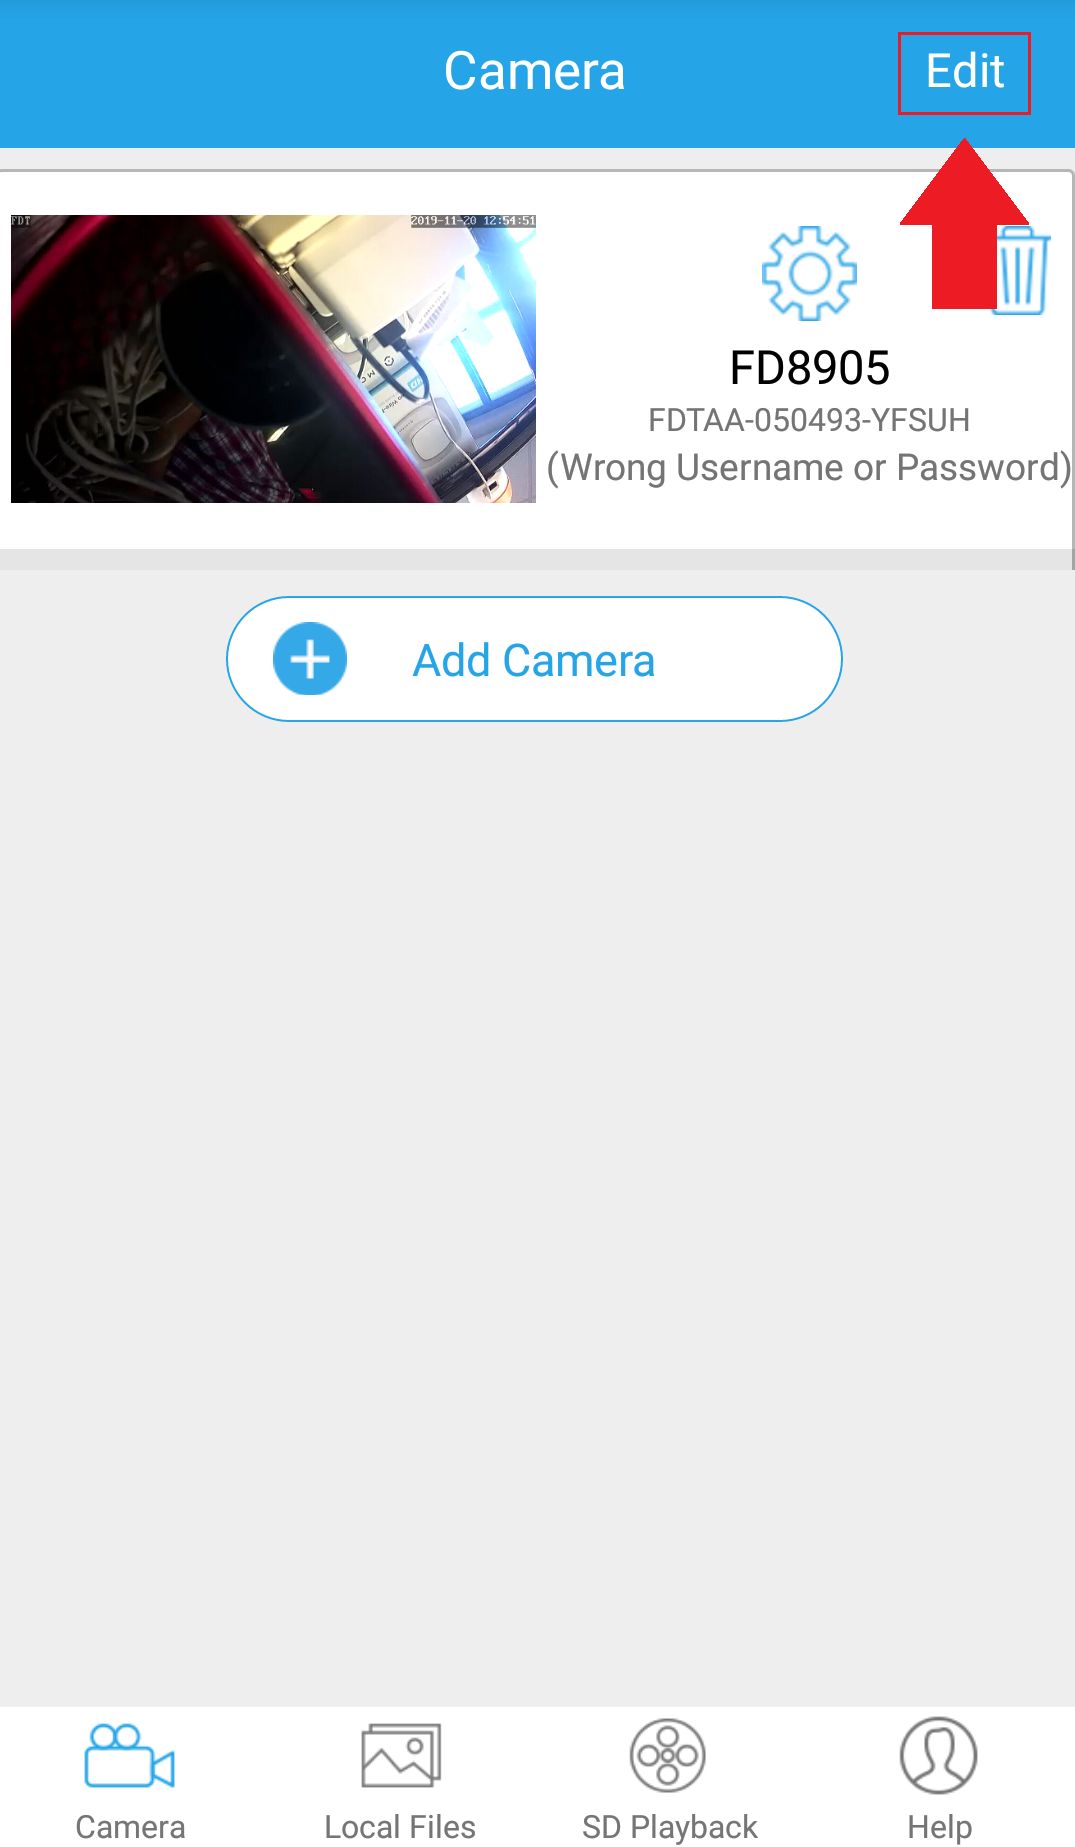
If the camera is showing (Wrong Username or Password) in the FDT View app after a factory reset the password will need to be updated.
Updating the Password
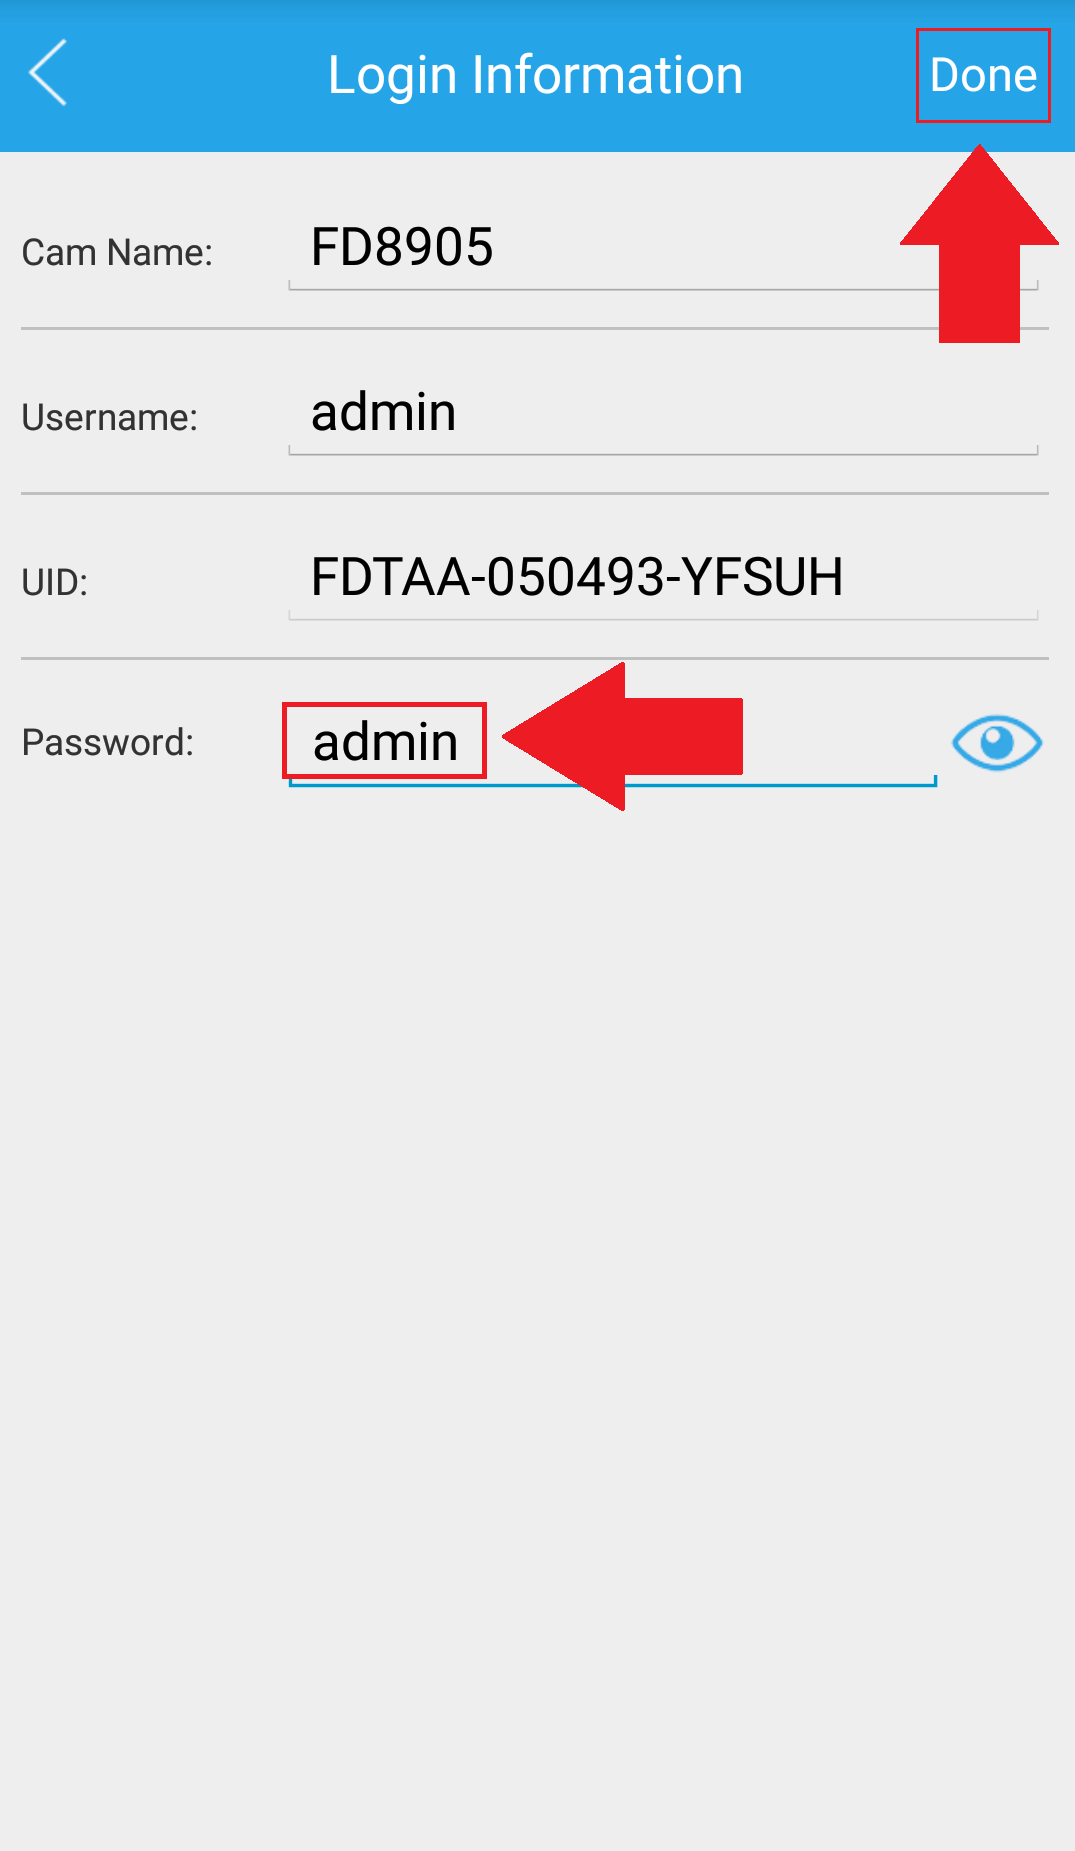
Step 1: Log into the FDT View app and tap on Edit.
Step 2: Select your device and in the password field enter admin. Tap Done.
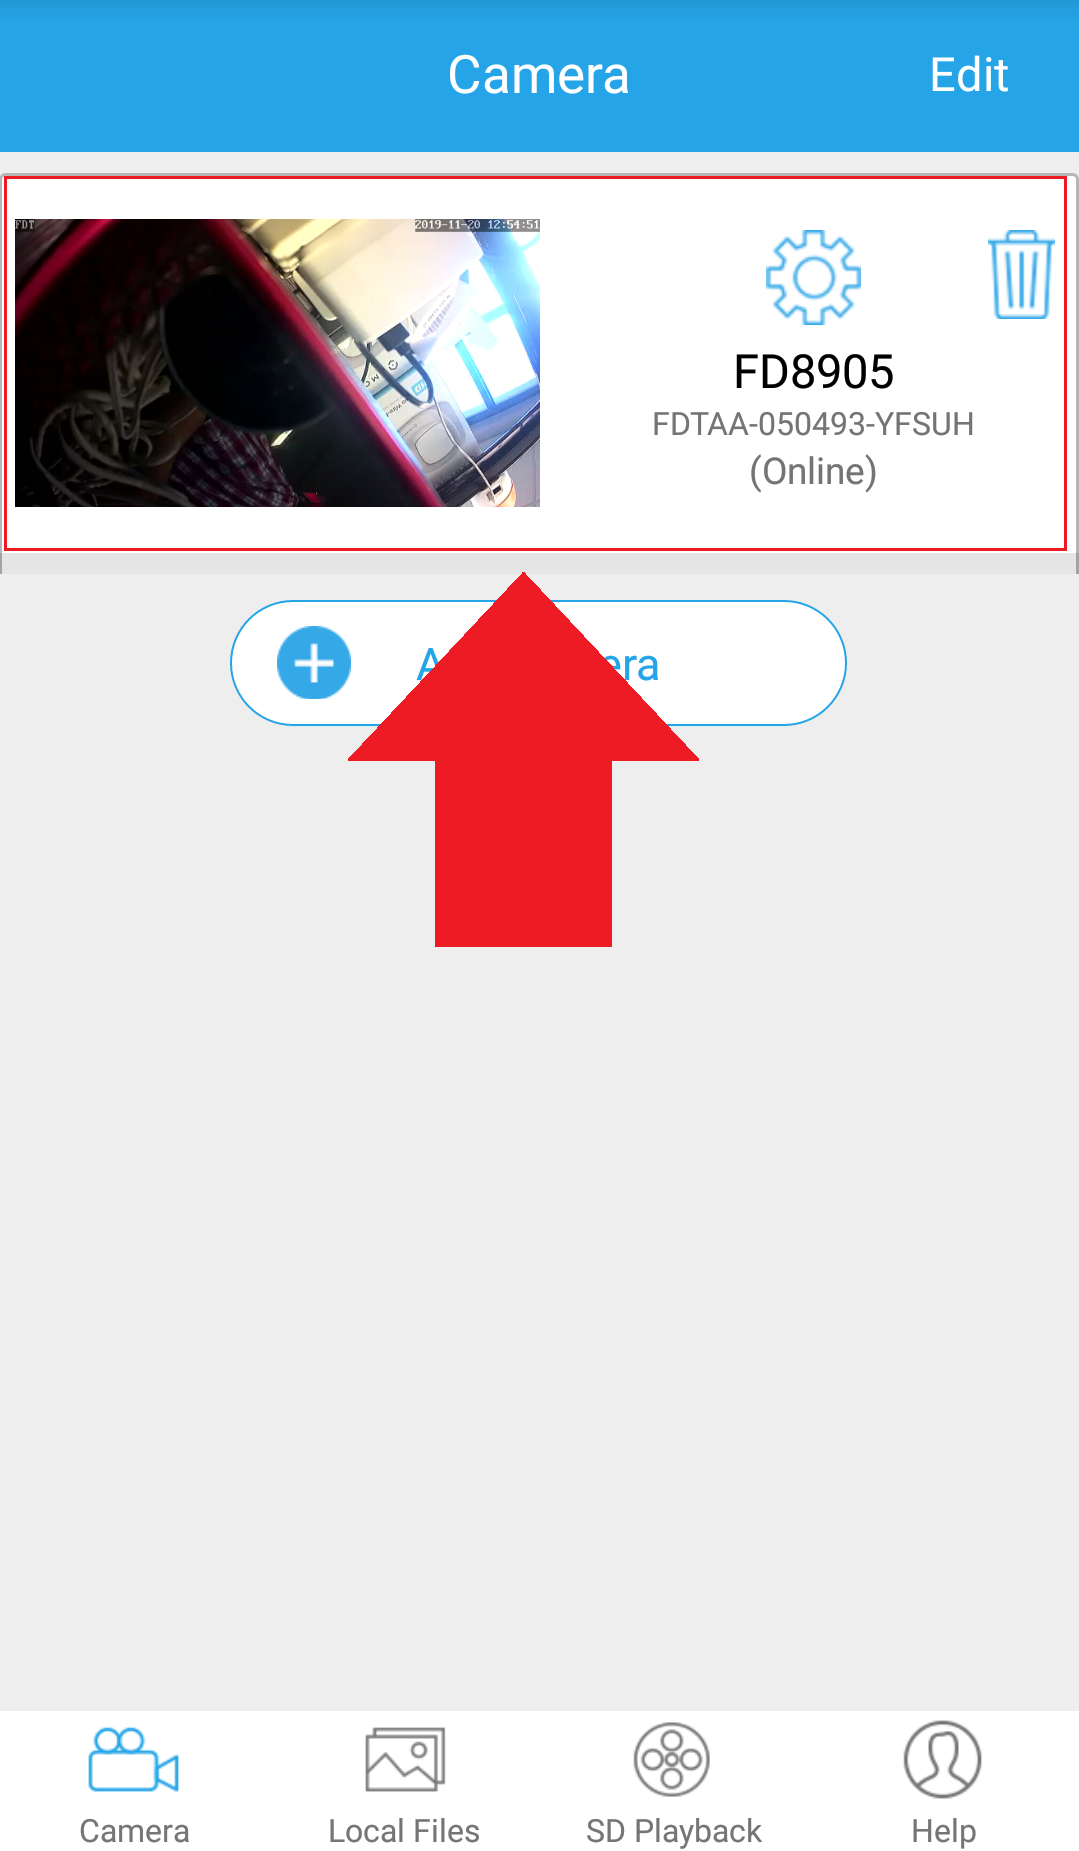
Step 3: Select your camera from the Camera menu.
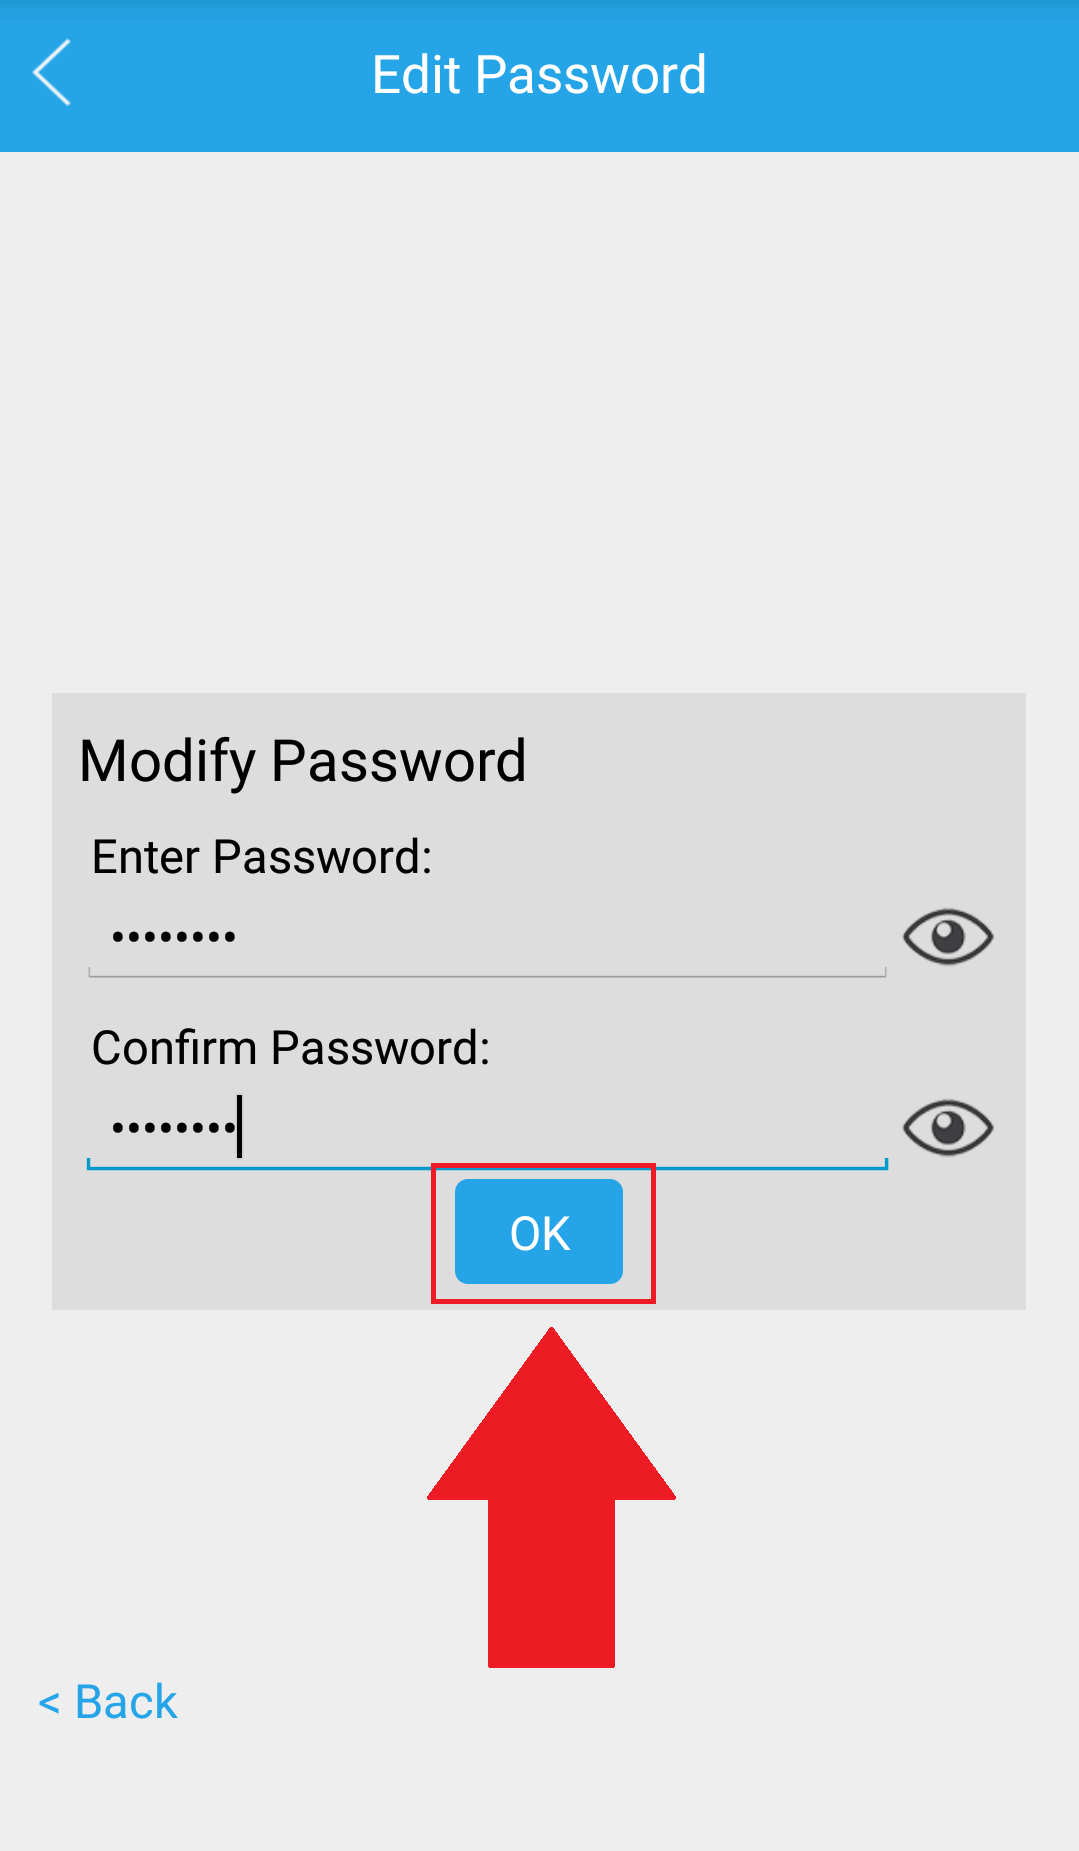
Step 4: The app will ask you to modify your password. Enter a password for your camera, confirm it, and tap on OK to continue.
Your FDT camera has now been properly reset and is ready to view.
Updating WiFi Settings
Since the WiFi settings for your camera have been set to default you will need to manually update the WiFi settings for your camera in the FDT View app. To update your WiFi Settings please refer to the information below.
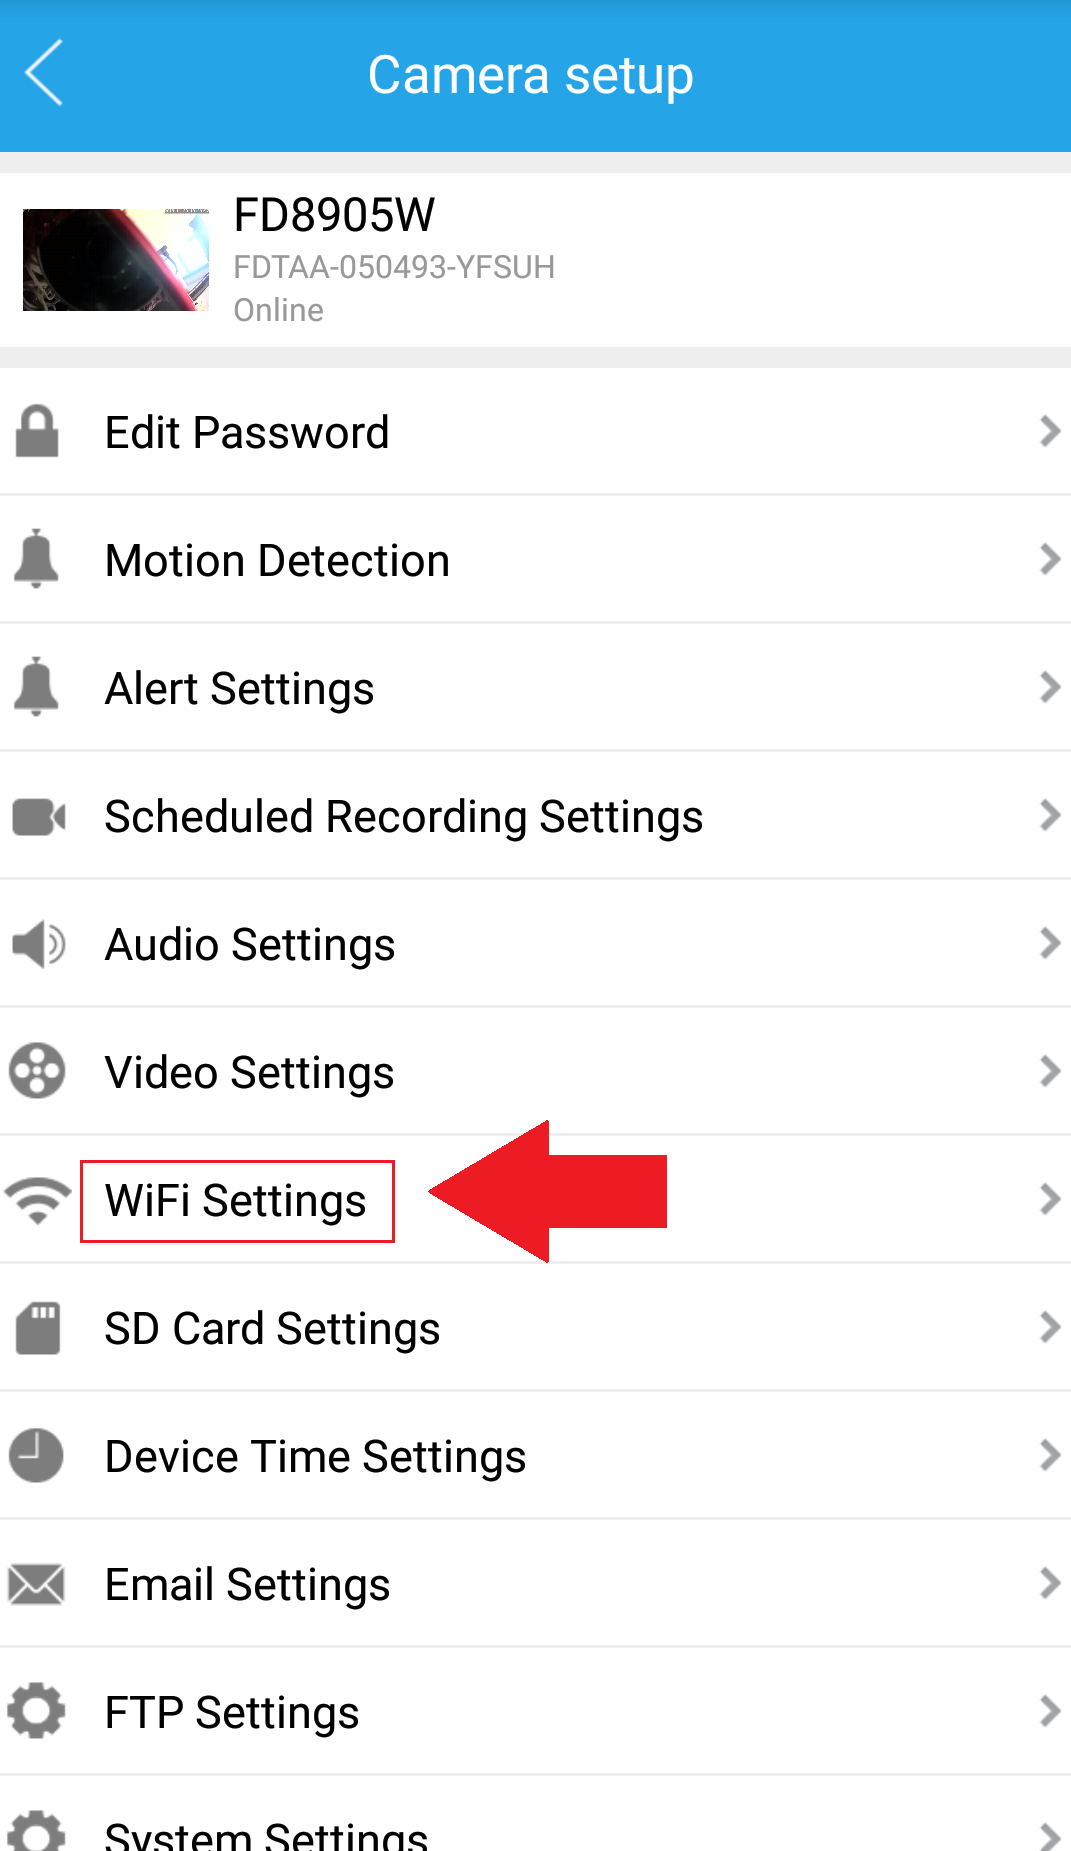
Step 1: Select your camera from the Cameras menu.
Step 2: Tap on the Settings icon ( ![]() ).
).
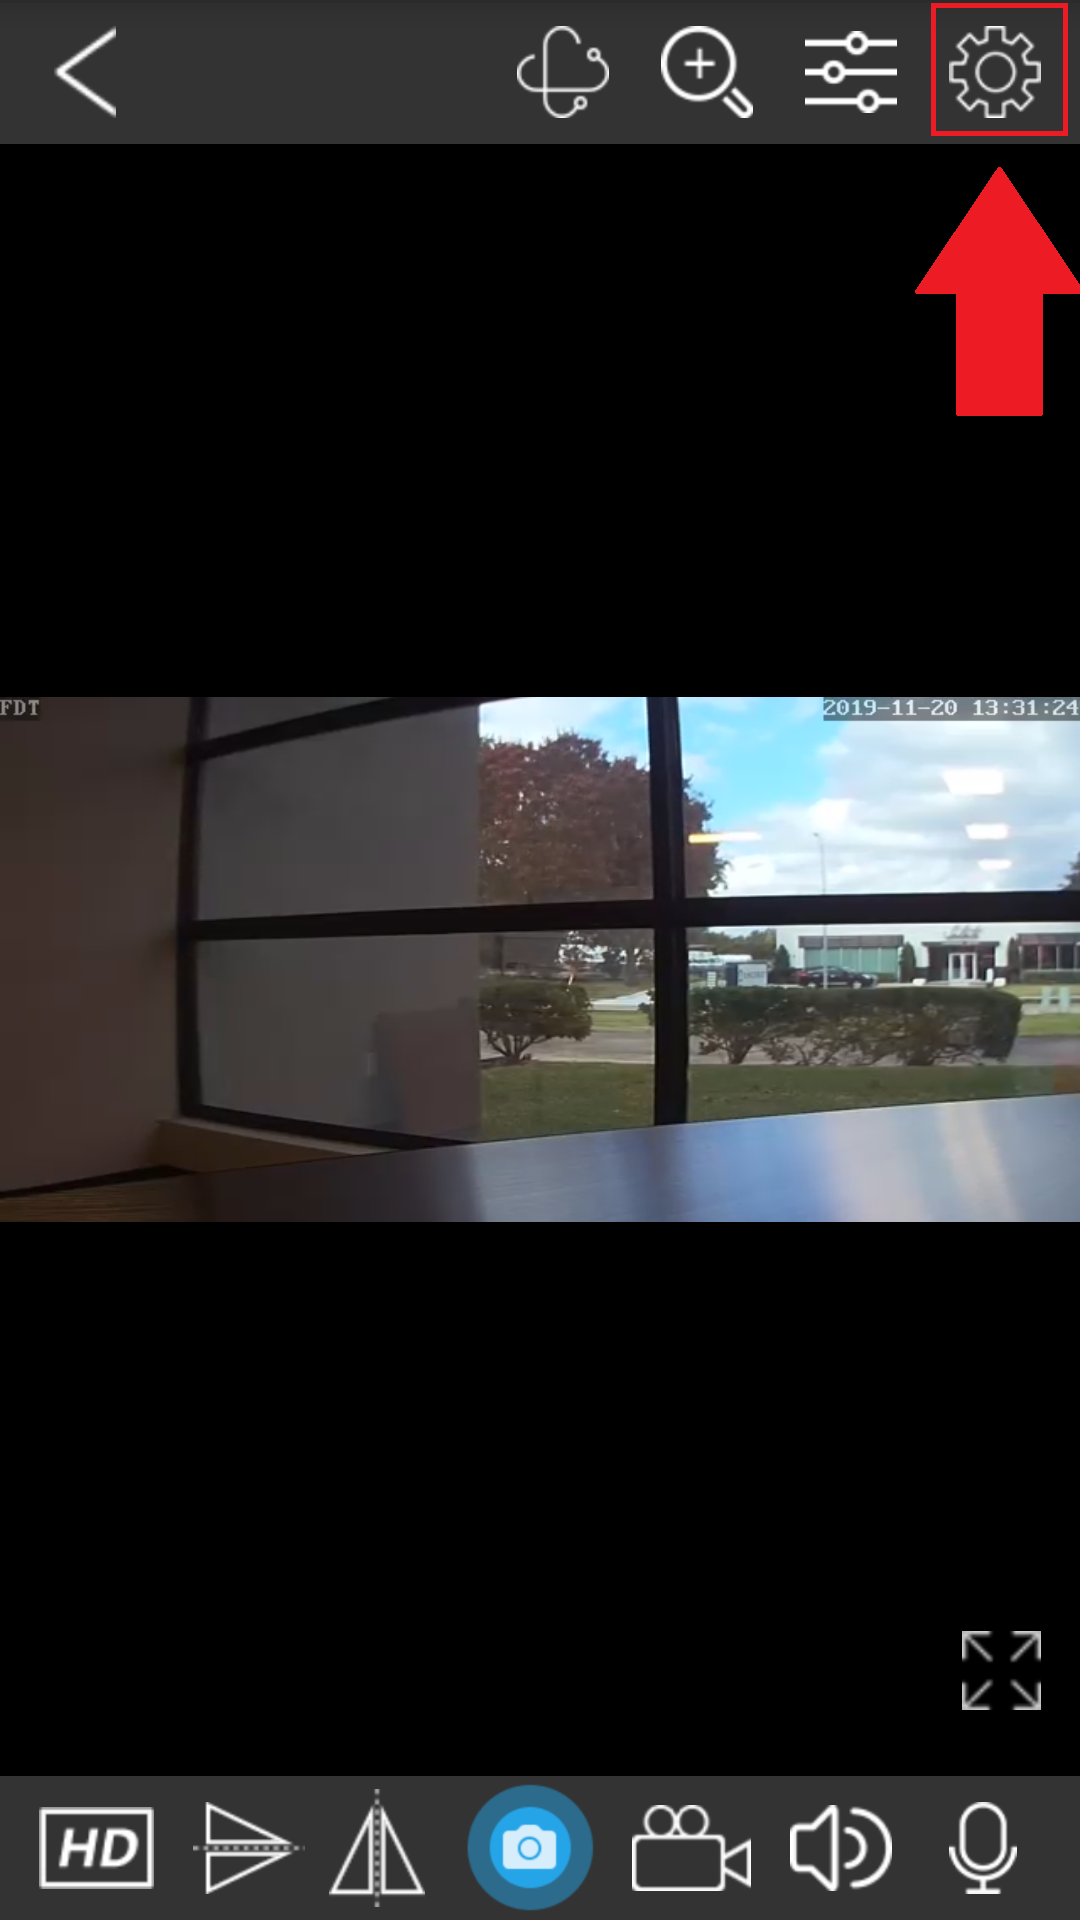
Step 3: Tap on WiFi Settings.
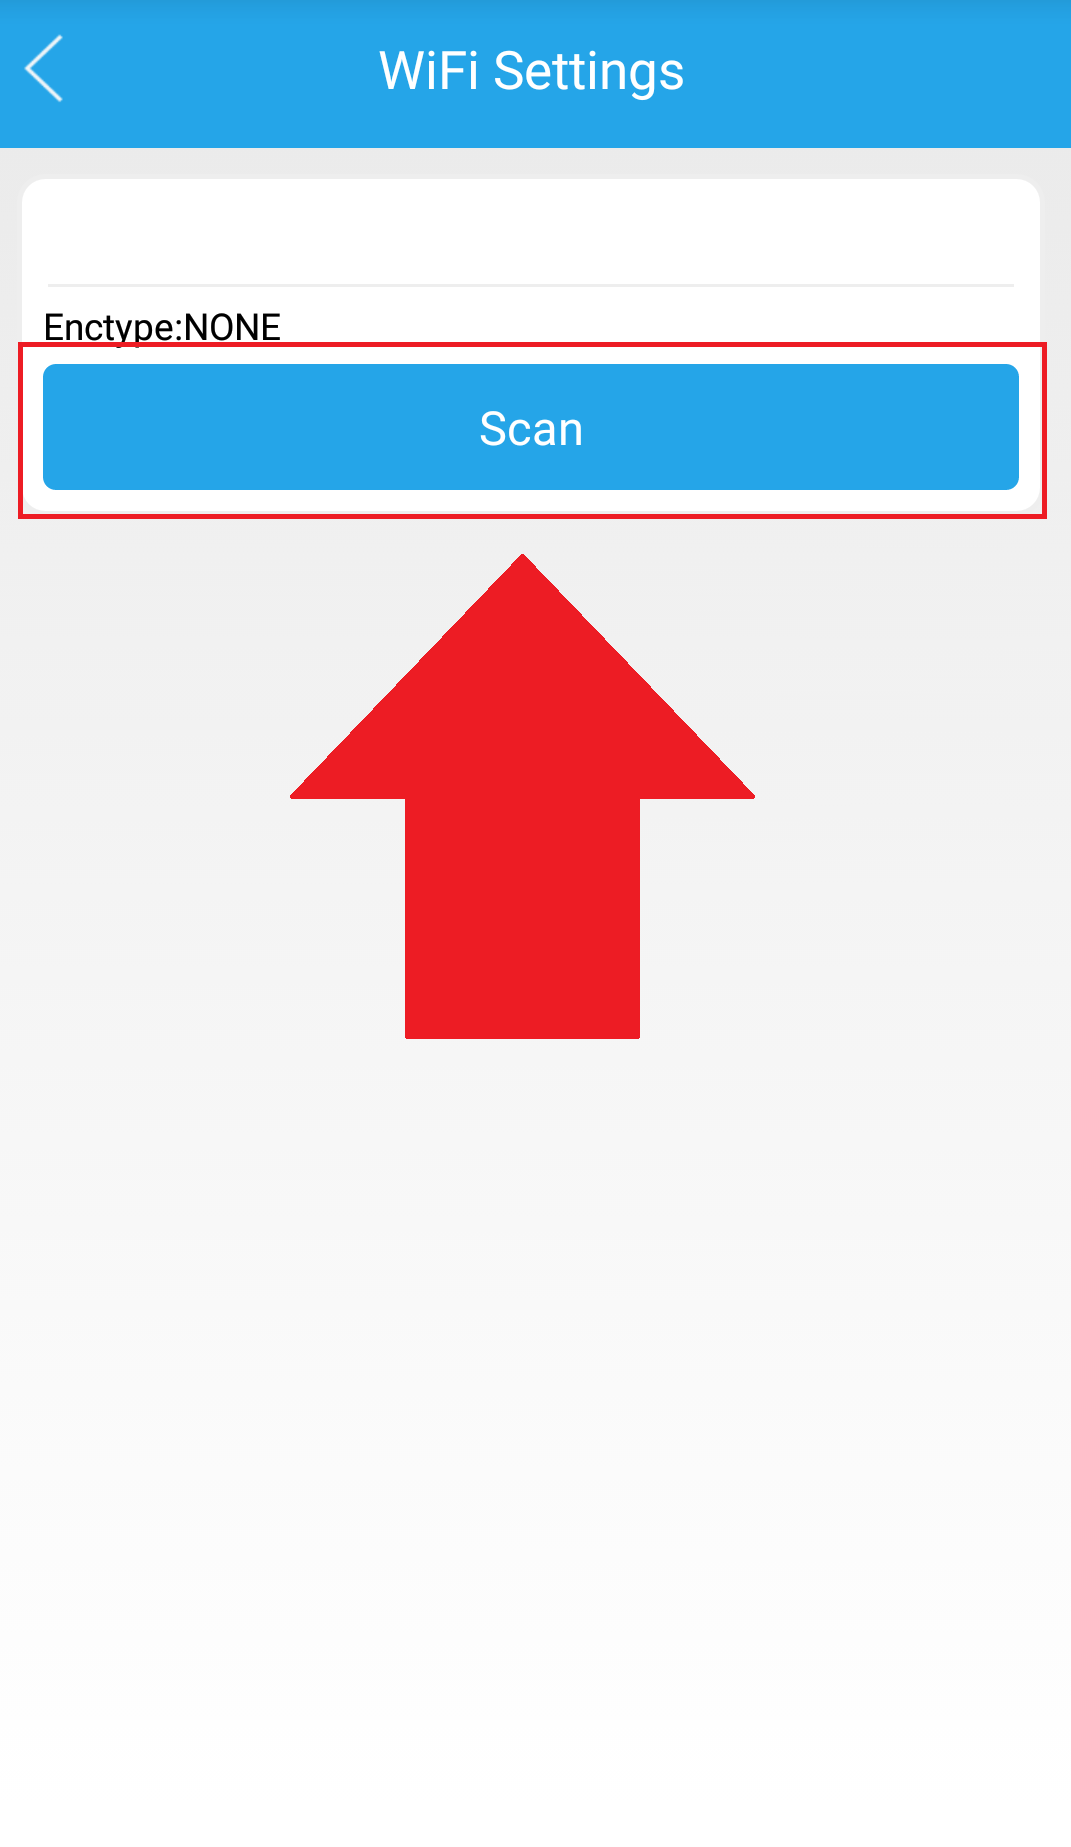
Step 4: Tap Scan to scan for your WiFi List and select your WiFi network from the list.
Step 5: Type in the password for your network and tap on Apply.
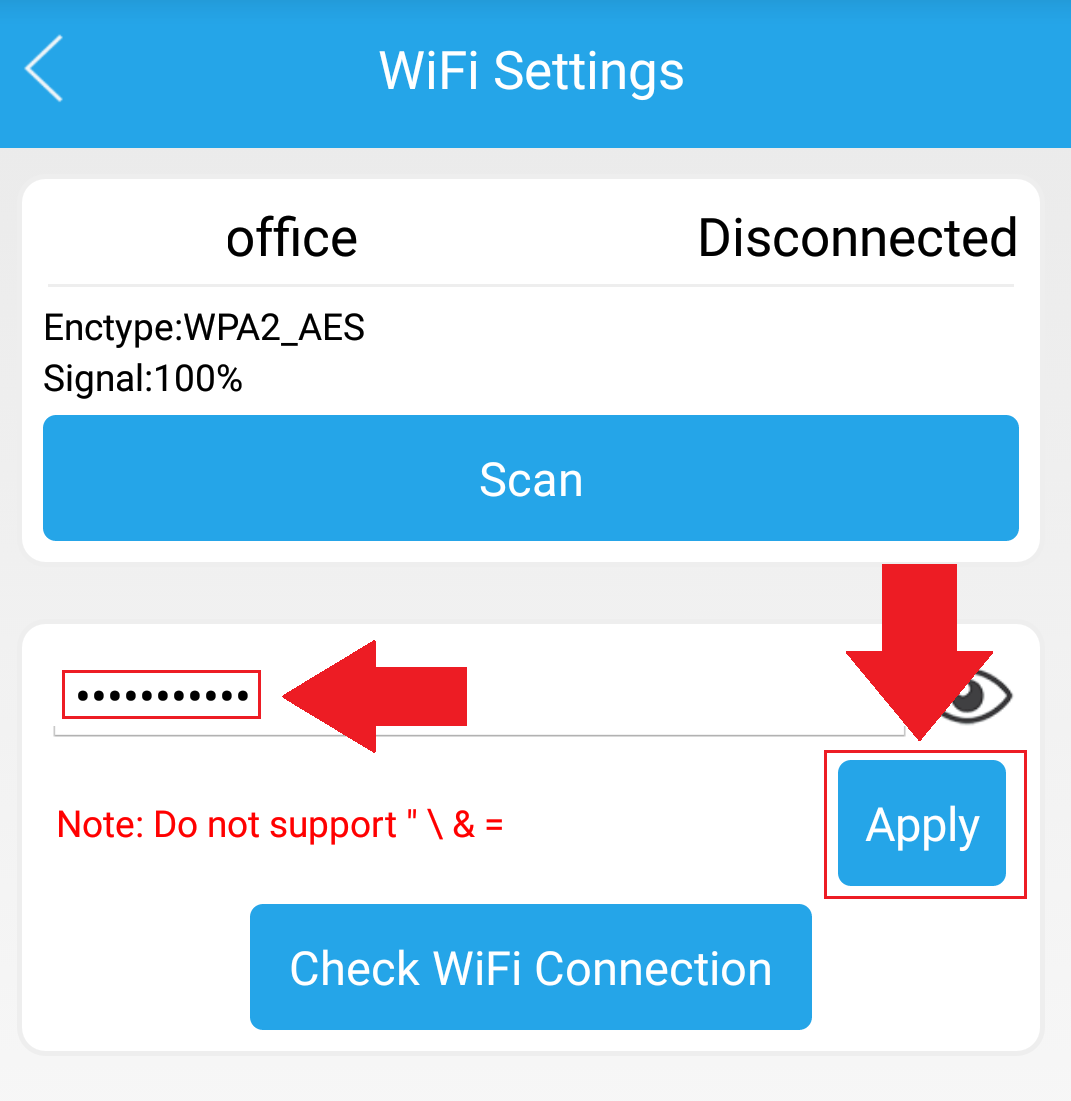
Note: You can check the connection by tapping on the Check WiFi Connection option.
After a WiFi connection is made, you can remove the Ethernet cable from the camera and view your camera using a WiFi connection.